JOIN THE GREATEST COMMUNITY IN CANNABIS
www.growcastpodcast.com/membership
Why would you ever pay for cannabis when you can grow POUNDS of top tier flower from just a few tiny seeds?
Growing your own cannabis at home can seem overwhelming when you research how to get started. That’s why we at GrowCast created our First Time Grower’s Guide – it takes all the guesswork out of the process and provides you with the steps you need to grow the most delicious and potent flower you’ve ever tasted.
It doesn’t matter if you’re a first time or seasoned gardener, or you’ve only had experience killing house plants. This grow guide is foolproof, and virtually guarantees you a successful first harvest. You’ll be set up with exactly what you need to succeed and be presented with a clear, step by step process that literally anyone can use to reap a massive harvest at home.
You’ll save a TON of money by never needing to buy flower again, plus it will be fresher and higher quality than 99% of the products on store shelves. Your home grown flower will also be totally organically grown, free of any pesticides or mold contamination.
And that’s just the beginning- you can go on to provide friends and family with quality flower, hunt through different varieties of cannabis to grow, and even cross those varieties to create your very own unique strains!
You’re about to start a lifelong journey of gardening and self sustainability. Simply follow this step by step guide to reap your own home harvest in just a few short months, for just a few hundred dollars. Trust me, it will fly by, and after that you’ll have an infinite supply of flower and you’ll never have to go to the dispensary again!
What You’ll Need Page
There are many ways to grow cannabis at home, and many different setups and styles, but all of them have a few things in common. If you’re growing indoors, you’ll want to purchase a grow tent kit to control the environment, light schedule, and odor. Your grow light will provide your garden with the light it needs. You’ll need seeds of course, as well as some soil and a container to grow them in. This guide is based around sub irrigated planters, which eliminates the risk of over and underwatering your plants.
We’ve taken the headache out of shopping for grow gear by putting together 3 custom price tiered grow kits for a variety of budgets and yield requirements.
- Feminized cannabis seeds
- Cannabis specific soil
- Sub-irrigated planter system
- Grow Tent Kit
- Solo party cups
Grow Kit Shopping Guide
Option #1: Weekend Smoker Kit – Cheapest
COST: ~$320
YIELD: ~2-6 oz per 12 weeks
1x Two pack of GrowCast Seed Co feminized seeds
1x Custom 2×2 Grow Kit with CityPicker planter
1x Small bag of seed starter soil
2 Cubic feet of cannabis soil
PROS
- Very low cost
- Tiny, stealthy grow
CONS
- Low yield
- Smaller plants
- Less dense buds
Option #2: Daily Smoker Kit – Recommended
COST: ~$420
YIELD: ~5-12 oz per 12 weeks
1x Two pack of GrowCast Seed Co feminized photoperiod seeds
1x Custom 2×4 Grow Kit with Earthbox planter
1x Small bag of seed starter soil
2 Cubic feet of cannabis soil
PROS
- Best bang for your buck
- Enough yield for daily smokers
- Relatively low cost
CONS
- Medium sized yields
- Bare bones equipment
Option #3: Ganja Farmer Kit – Most Yield
COST: ~$1500
YIELD: ~14-32 oz per 12 weeks
1x Six Pack of GrowCast Seed Co feminized photoperiod seeds
2x Earthbox planter
1x AC Infinity 4×4 Pro Grow Kit – Use code GROWCAST15 for 15% off
1x Small bag of seed starter soil
4 Cubic feet of cannabis soil
PROS
- Top of the line equipment
- Massive harvests
- Bluetooth and data enabled
CONS
- Higher price point
- Larger grow footprint
Buying Cannabis Soil
It’s most cost effective to buy your soil locally! Visit your local grow store and purchase one of these cannabis specific brands listed below.
NOTE: Do NOT use regular garden soil or Miracle Gro, as it is not balanced for cannabis and will harm the quality.
- Build a Soil (3.0 or Craft Blend)
- Bio365
- Purple Cow
- Roots Organic
- Detroit Nutrient Company
- SD Microbes
- KIS Organics
If you can’t find soil locally, you can order from www.buildasoil.com
Step-by-step Grow Guide
Now that you’ve got your gear, let’s get ready to grow!
Setup your tent according to the instructions provided, and make sure you cinch all the ports closed so it’s light tight.
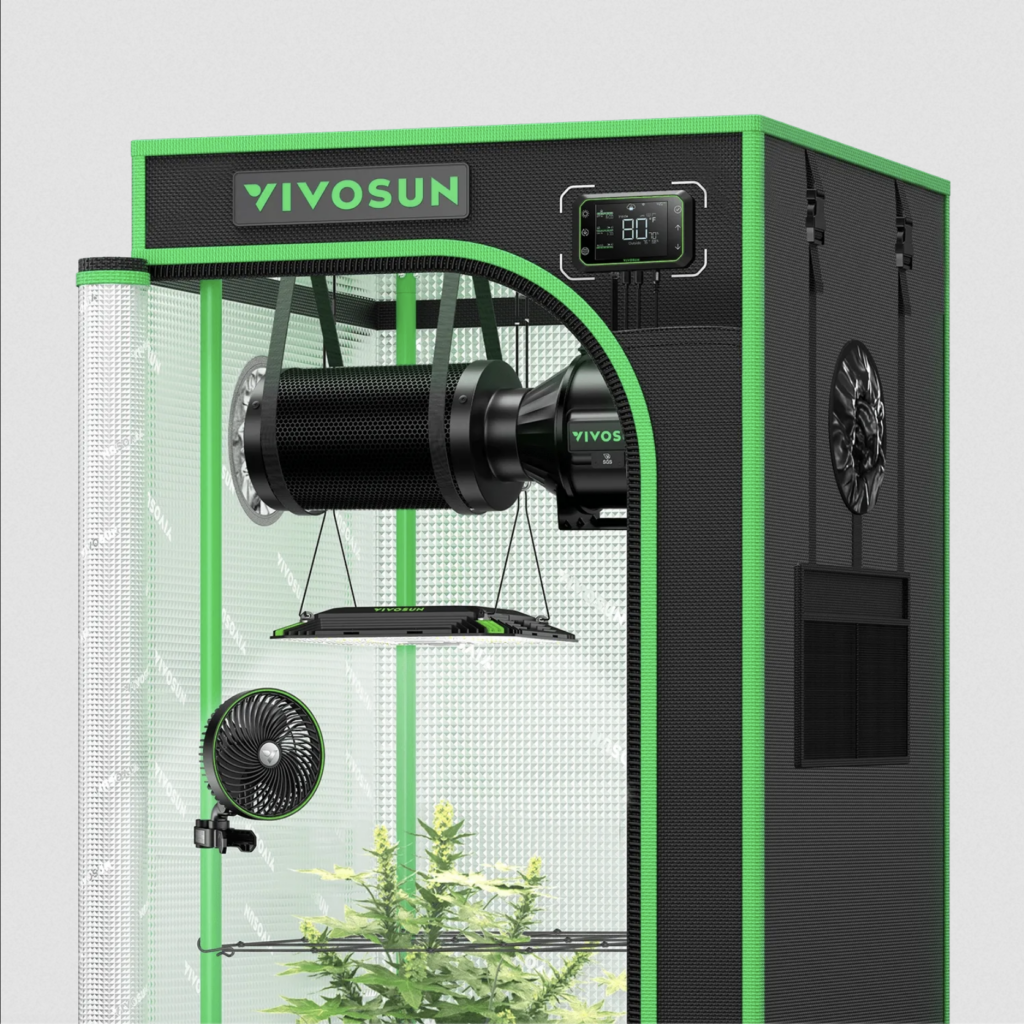
You are now ready to start your lifelong gardening journey, and unlock an infinite supply of the best quality cannabis you could possibly consume.
Without further delay, let’s begin!
————
Seedling Stage
In this stage we will sprout our seeds in a solo cup of seed starter mix before putting them in our planter.
-Take two solo party cups per Earthbox (one if you’re using a City Picker) and carefully use a knife or screwdriver to punch a small drainage hole in the bottom of each, fill the cups with seed starter mix and gently compress.
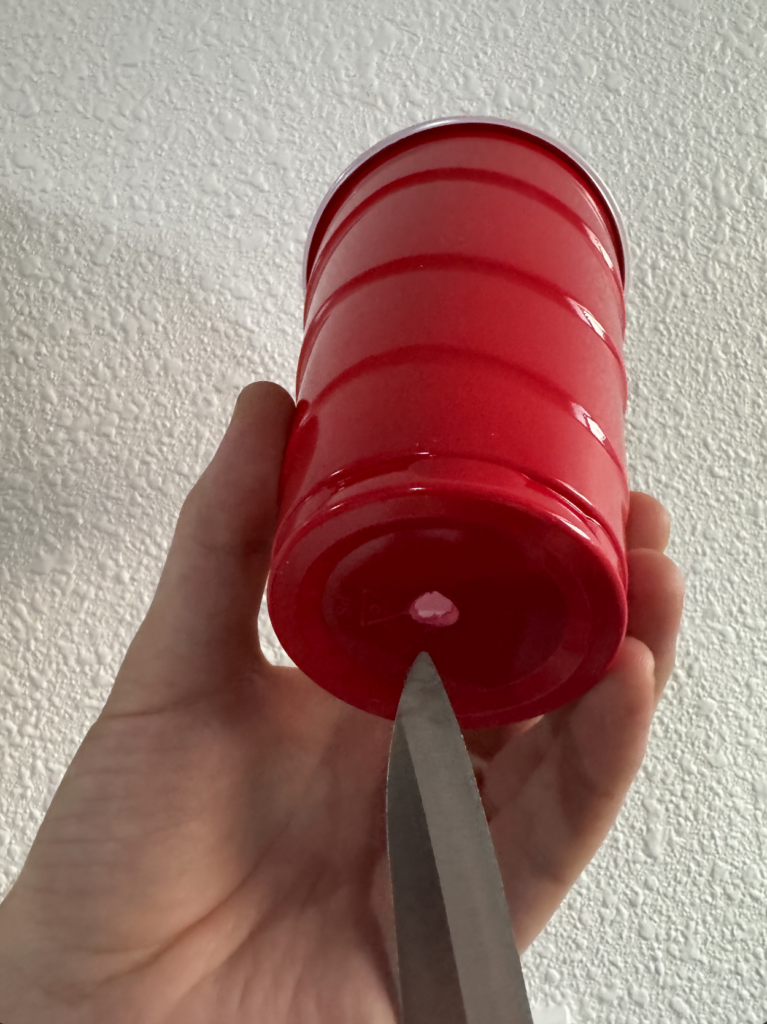
– Place one feminized seed in each cup, in a half inch deep hole – then cover the seed with soil.
– Gently water your solo cups thoroughly until a small amount of water runs out of the bottom hole (about 3 oz of water).
– Place your solo cups under your grow light at 50% power, hanging 22-24 inches away from the cup, leaving it on 24/7.
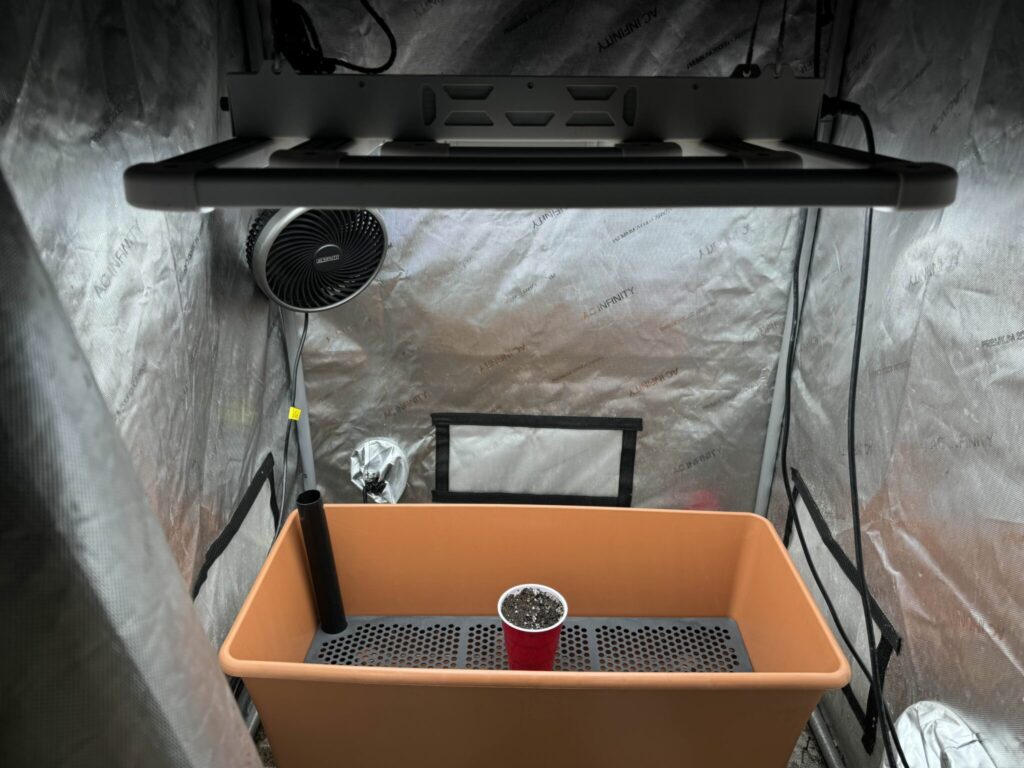
-Adjust your tent’s exhaust fan to about 4/10, high enough to keep the temperature between 75 and 82 degrees.
-Seedlings will break ground quickly and begin to grow. If it stretches out very lanky, turn up your light or move it closer.
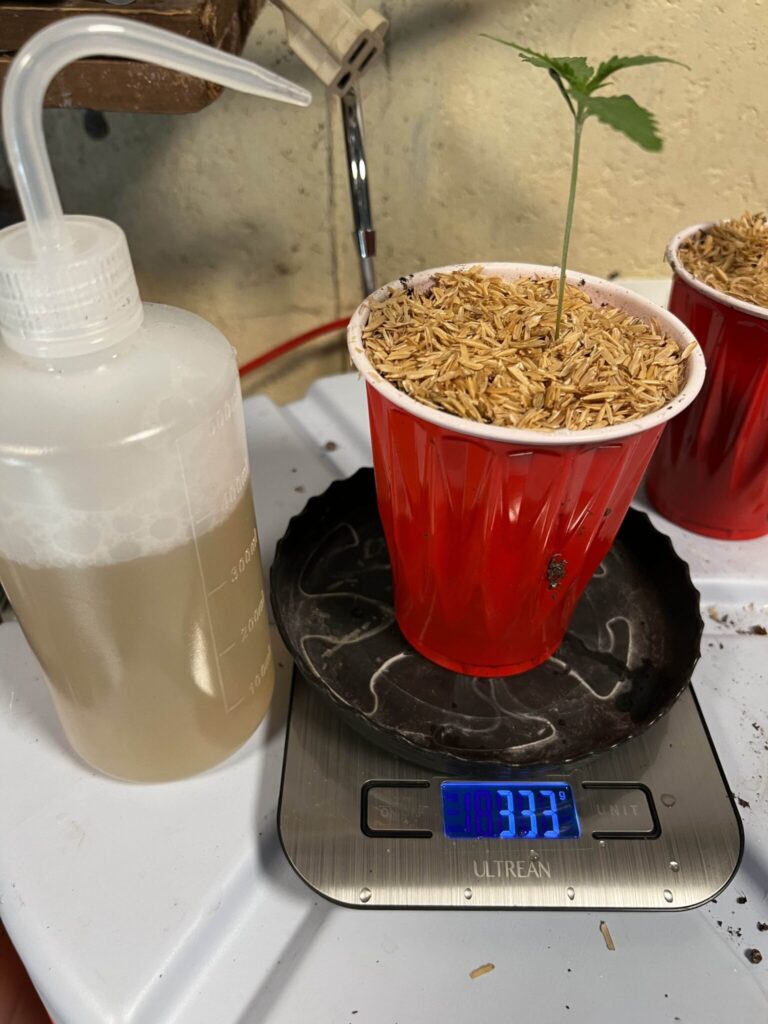
*Don’t water your seedlings again until the soil in the cup dries out thoroughly- to about the dryness it was when it was pulled out of the bag. Overwatering (watering too frequently) is the biggest killer at this stage, avoid it at all costs!
*Don’t place seedlings in a tent sitting on a cold surface like concrete. Place it inside your assembled, but empty, planter.
*If one of your seedlings dies, don’t worry- you can continue this grow guide with just one plant per Earthbox.
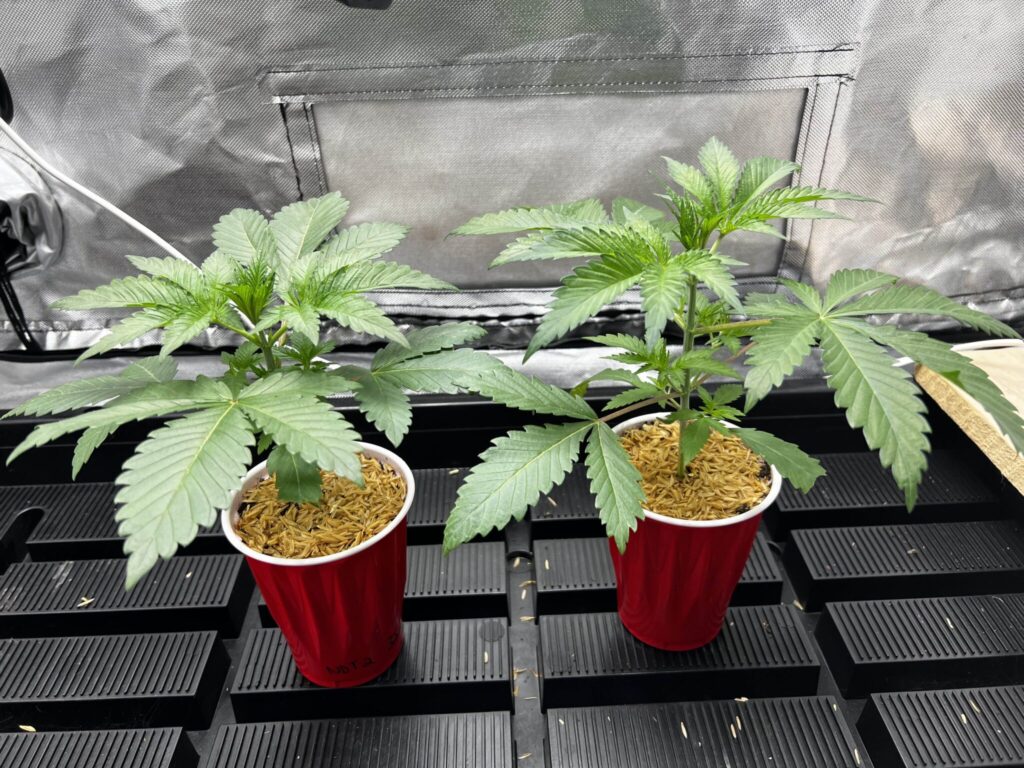
Your seedlings will start with two round leaves, but soon start growing their first pointy “true leaves.” Once its leaves hang over the edges of the solo cup when viewed from above (about 7 days after breaking ground), it’s time to move onto the vegetative stage.
————
Vegetative Stage
Once your plant is ready for the veg stage, it’s time to transplant it into your planter full of rich cannabis soil. This stage will last about 4 weeks as the plant grows in size, until it’s time to enter the bloom stage and start producing buds.
Starting Veg:
-Set the timer on your light to 18 hours on and 6 hours off (set the on time to match when you can work in the garden).
-Assemble your Earthbox or City Picker and fill it with your rich cannabis formulated soil, being sure to pack down the corner spaces. This is VERY important!
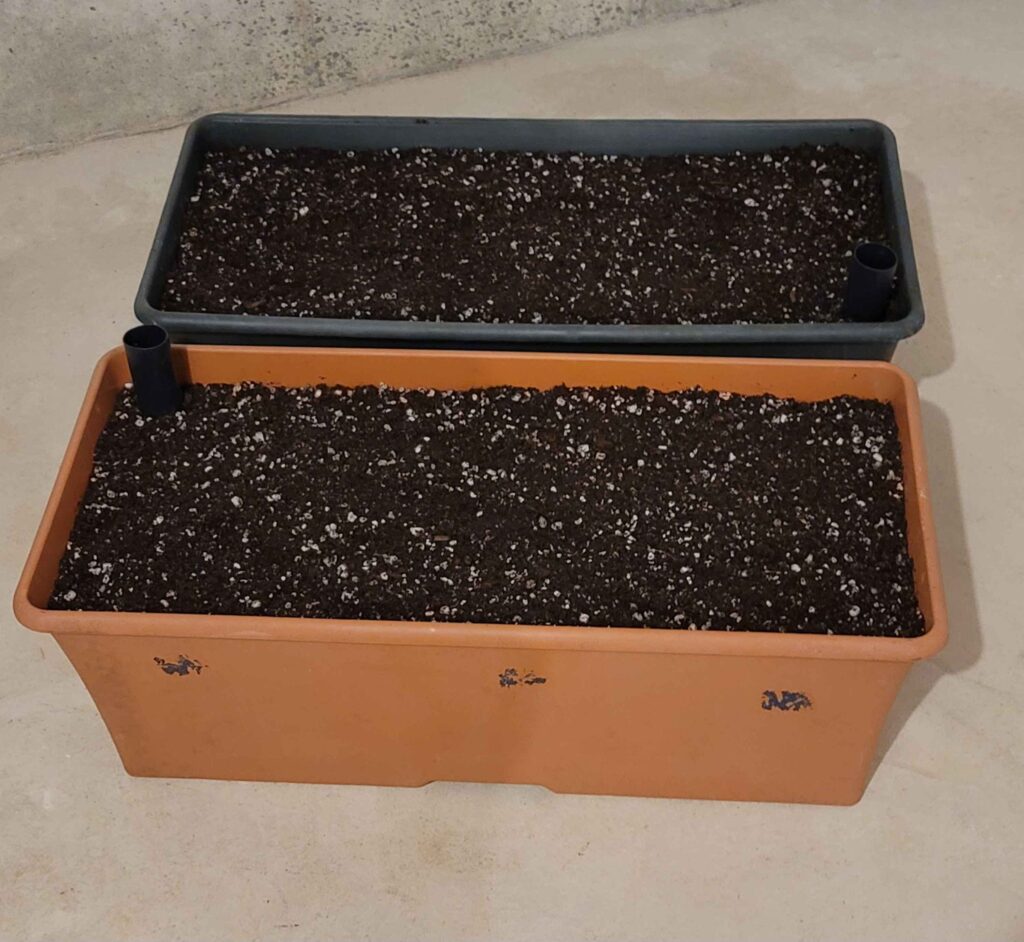
-Dig a solo cup sized hole in your soil (you can add worm castings, myco products, or compost to the hole at this stage) and gently un-pot your plants from the solo cups.
-Carefully place the plant’s root ball in the hole, trying not to disturb the roots, and cover it with soil ending with a gentle but firm press.
-Once your plants are in their new home, slowly disperse one gallon of filtered water (you can add microbe products or humic acids) across the entire soil surface.
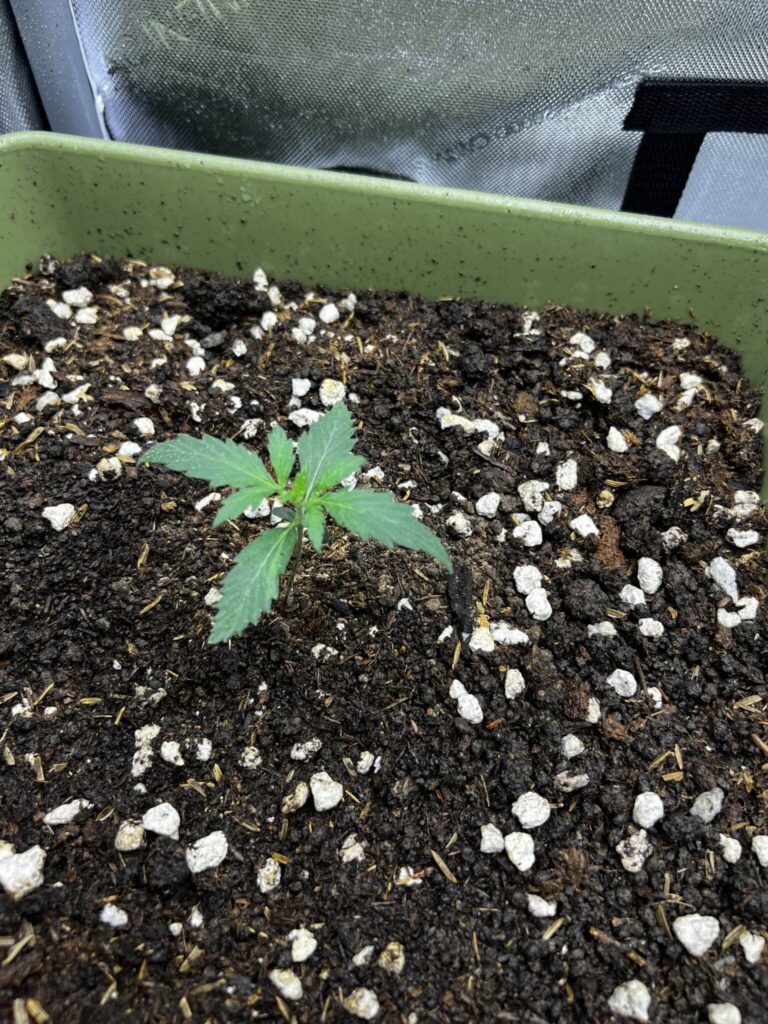
-Use the provided tarp to cover the soil (cut holes out to allow the plants to poke through), or add a mulch layer of rice hulls. Leave the watering tube and bottom reservoir empty for now.
-Your plant is now vegetating! We will now wait about four weeks for it to grow in size, and begin pruning it to shape it for better end results.
*It’s important to raise the light height as your plant grows, keeping it about 16 inches above the tallest point of your plant at all times as you increase the power over time.
Veg Week One: In week one we are very hands off and letting our plant establish in the planter and get used to its new home. After 4 days in the planter, apply a natural pest spray product like horticultural oils or a gentle enzyme product like Doctor Zymes. This will deter pests without being toxic to you or the plant. During this vegetative stage only, spray once a week, and always spray while the lights are off.
Veg Week Two: After a full week in the new planter, pour plain water down your watering tube until its bottom reservoir is full. From now on this is how you will keep the plant watered, by refilling this tube instead of watering the soil itself. You’ll know it’s full when water escapes the overflow valve on the side. Ideally you want to wait for it to drain fully before refilling it each time. Turn your light up to 75% power, hanging 16-18 inches above the plant. This may increase the heat, so turn up your exhaust fan to keep it between 75-82 degrees if you need to.
It’s also now time to top prune!
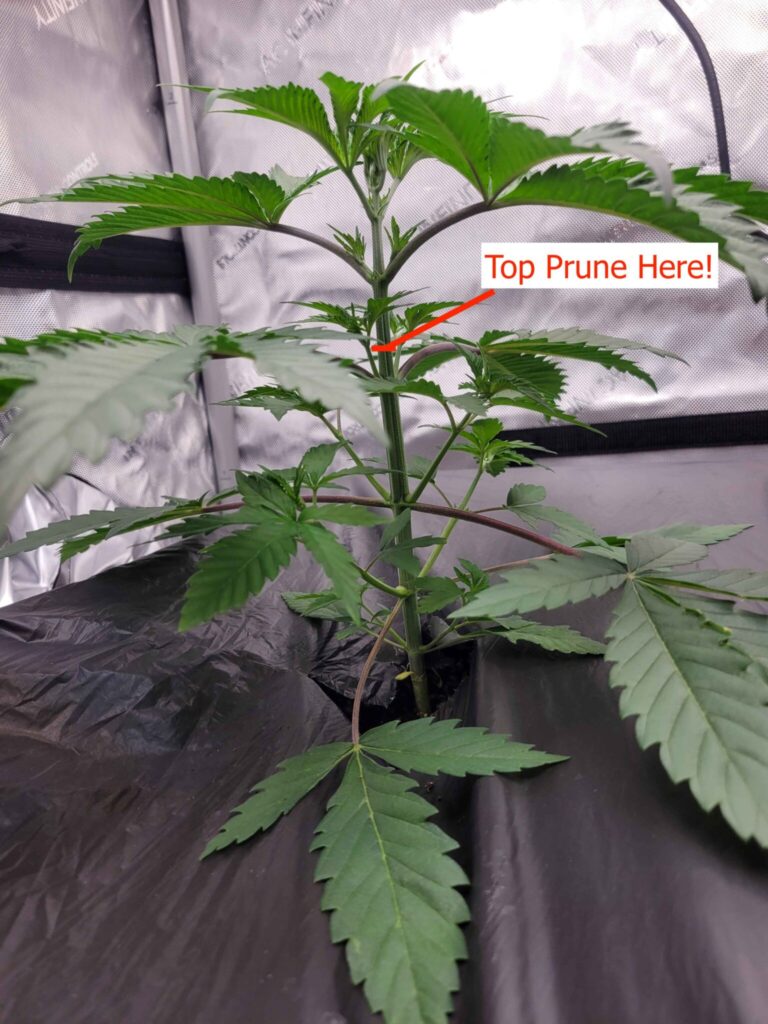
Top Pruning: You’ll know it’s time to top prune your plant when you have 3 or more sets of large leaves. Locate the intersection where the leaf sets meet the main stalk, and cut the plant right above the growth set (essentially decapitating it- but don’t worry, they love a haircut).
The two branches right beneath your cut will grow upwards, becoming the new top branches of the plant, thereby doubling the amount of “tops” that it has. Perform your first top pruning here in week two.
Veg Week Three: Take a look at your two new top branches, and any side branches that also reach the top of the canopy. Perform a second top pruning on all these branches. Continue your weekly pest spray, and continue feeding through your planter tube as usual.
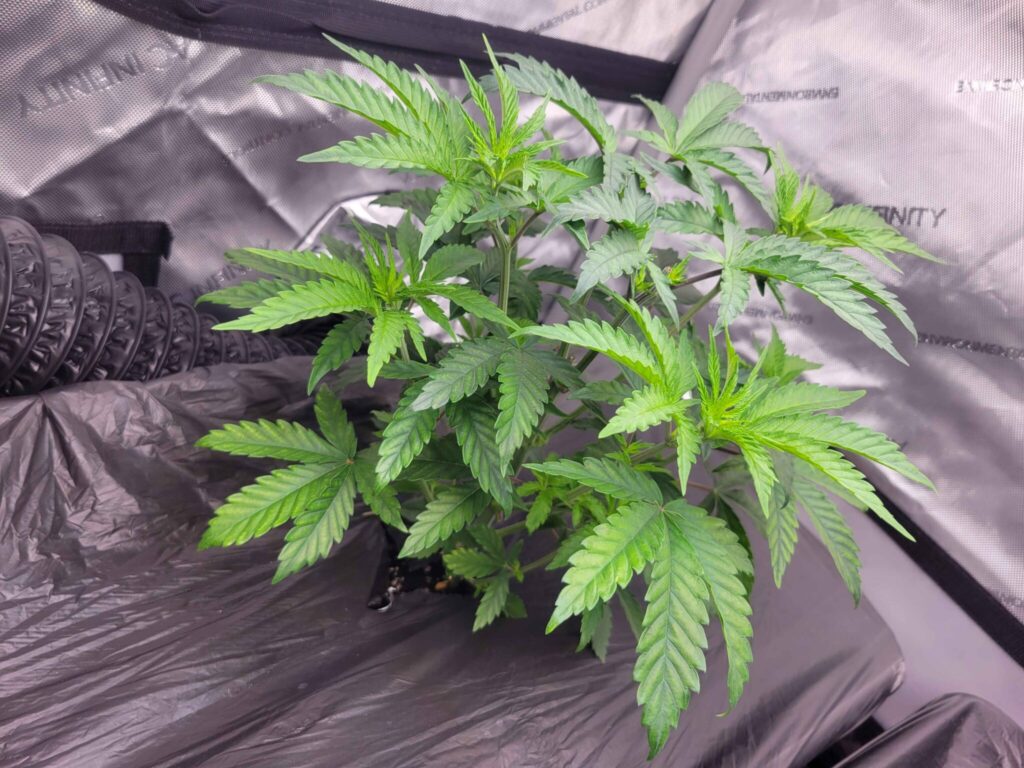
*Note: If you’re in a 2×2 or similarly short space and your plant is growing very tall, you may want to skip week four of veg and go right to flower. Keep in mind your plant will 1.5x to 2x in height after flowering begins, so if it’s already cramped, skip week four!
Veg Week Four: This week is your final chance to top your plants before flowering. Turn your light power up to 100%, hanging 16 inches above the plant. You may need to turn up your exhaust as well due to the heat. Perform one more top pruning on all of the branches that reach the top of the canopy, and spray for pests one last time before entering the flower stage.
After four weeks in your sub irrigated planter, and 3 to 4 top prunings, you’ll have a large plant with many tops, creating your final canopy that will develop into big, beautiful buds!
Remember to continue watering through the tube and bottom reservoir for the entire remainder of the grow.
It’s now time to move into the flowering stage, before your plant gets too big for your tent.
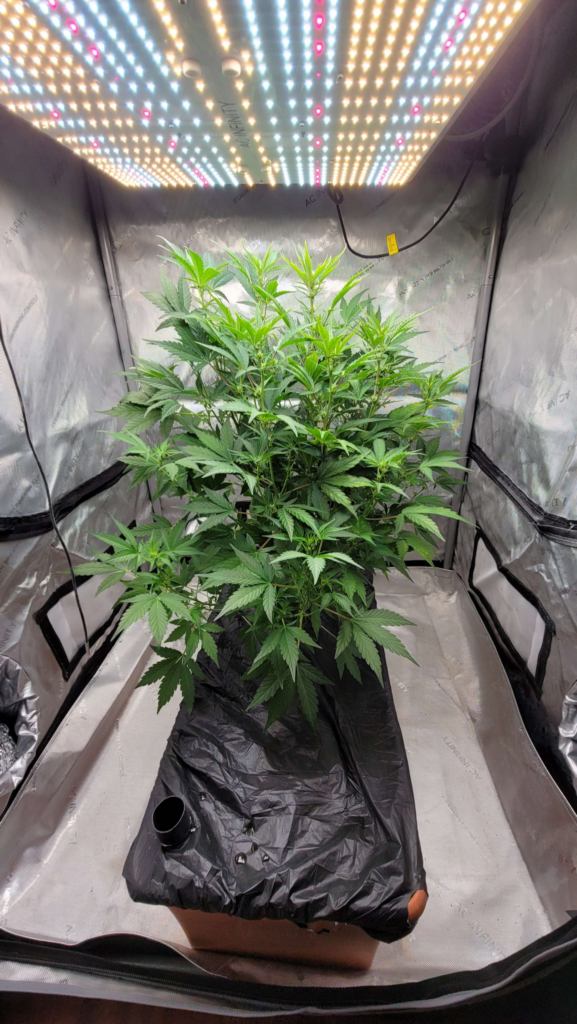
Flowering Stage
The flowering stage is the final stage of growth where your buds will develop to an eventual harvest time. In this guide we are working with a 9 week flowering time, though some strains require longer.
Preparing for flowering:
-Double check to make sure your tent is light tight, then adjust your light timer to 12 hours of on time and 12 hours of dark time to start flowering. It is crucial to keep the tent completely sealed during lights off in the flowering stage to avoid crop seeding.
-Make sure your light power is turned up to 100%
-The day you adjust your lights timing to 12/12 is your “flip day.” Mark this down in your calendar to keep track of how long you’ve been flowering. Your harvest date is going to be 8 to 9 weeks after this day.
-High humidity can cause mold to form in your flowers. Make sure your RH is 60 or below, add a dehumidifier if needed.
-You’ll want to stop spraying any pest sprays as soon as you see buds forming.
-You’ll also want to “bottom prune” right upon flipping.
Bottom Pruning: Take some gardening scissors and prune any branches that don’t reach the top of the canopy at their peak. You should strip foliage about 1/2 to 2/3rds of the way up the main stalk.

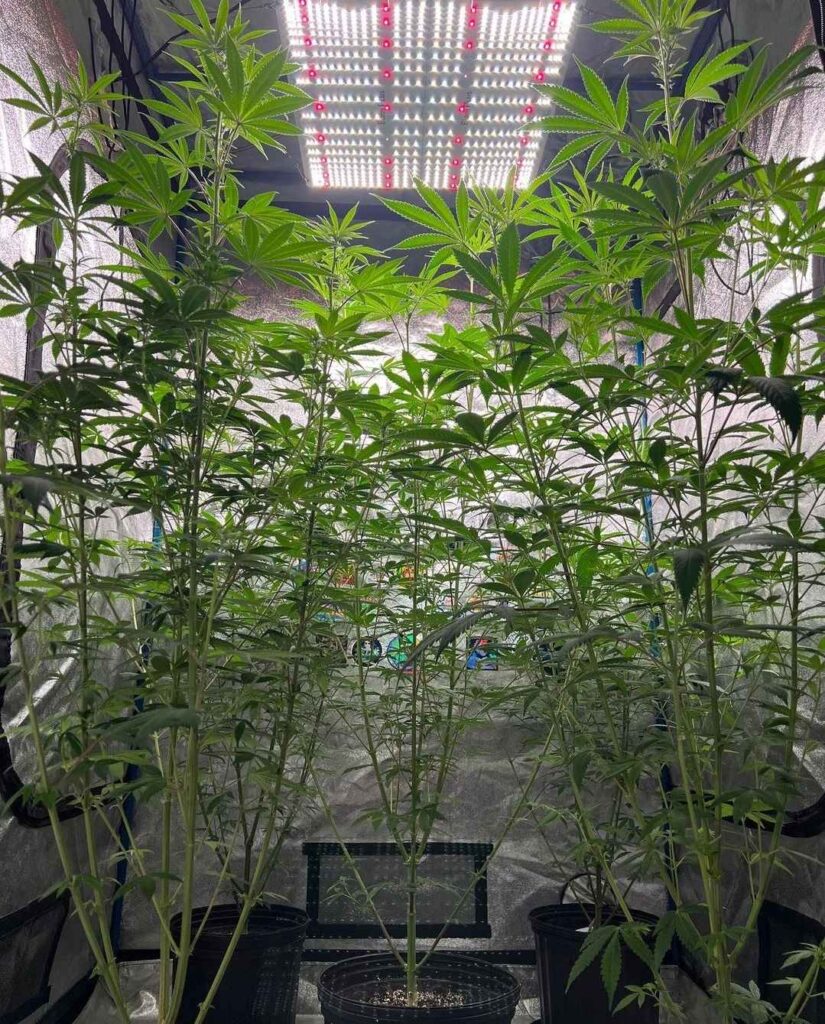
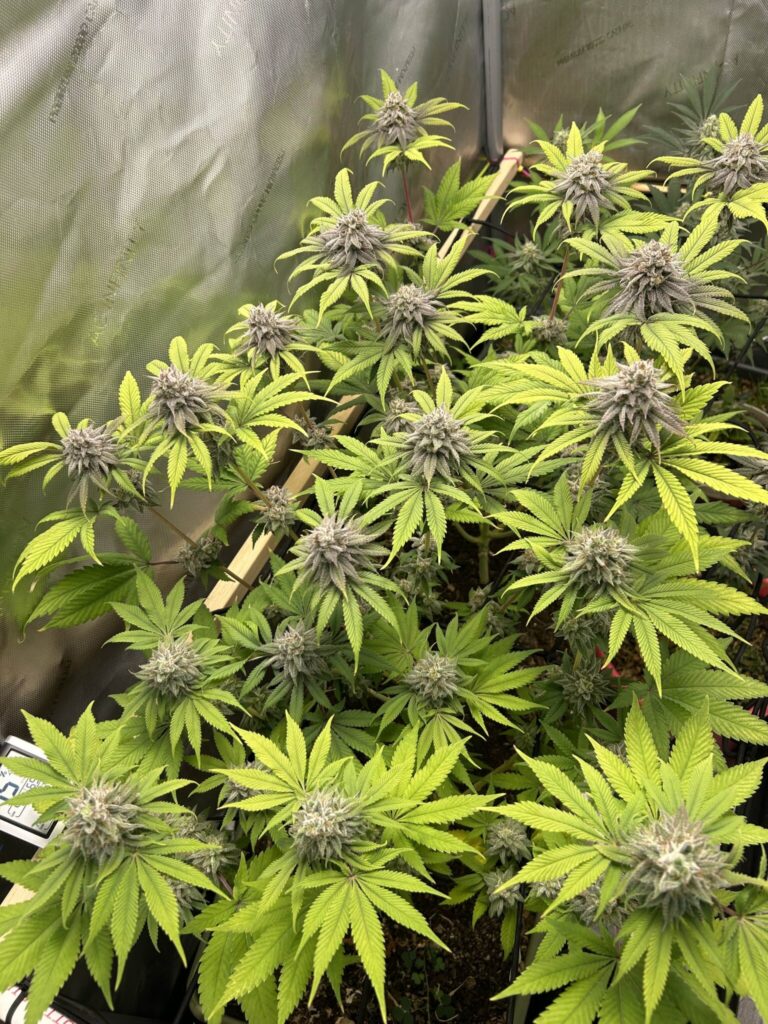
Defoliating: You can also remove some of the big fan leaves if they are crowding each other- you want air to easily pass through the mass of the plant. See pictures for details.
Once they’re bottom pruned and defoliated, you’re ready for the flower stage!
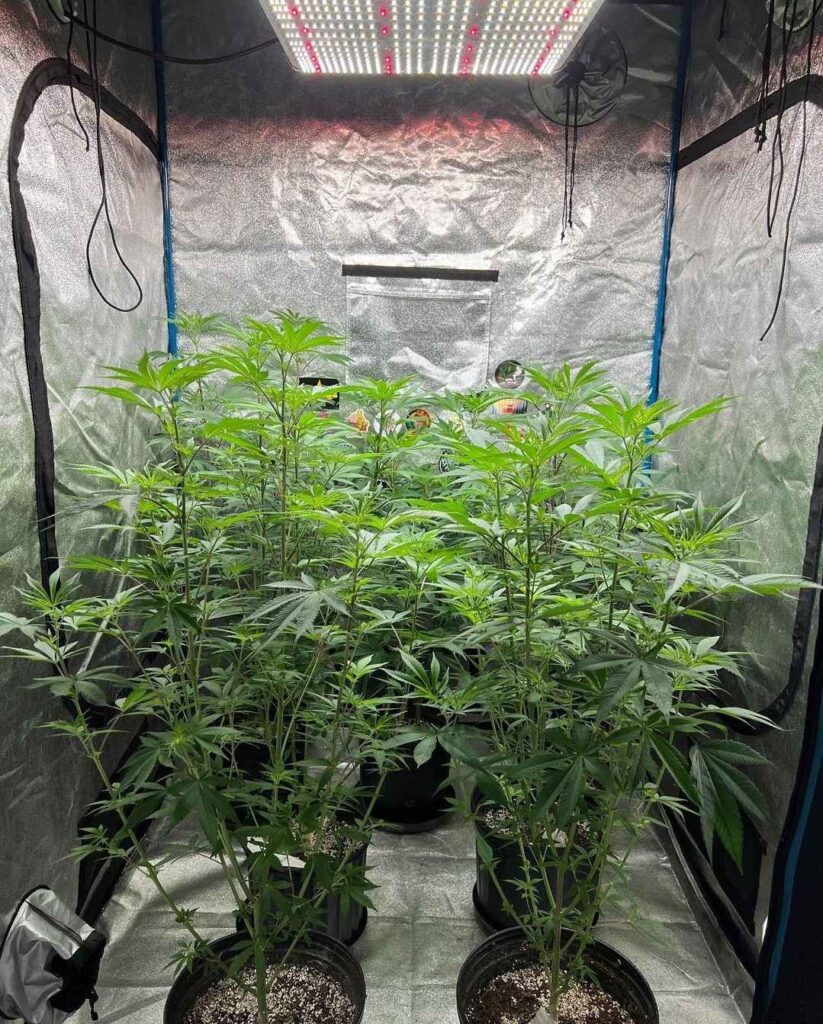
Flower Week 1 and 2: In the first weeks of flower the plant will be in its “stretching” phase. Expect the plant to 1.5x or even double in height by the end of the stretch period. You will also start to see white hairs and tiny buds begin to develop.
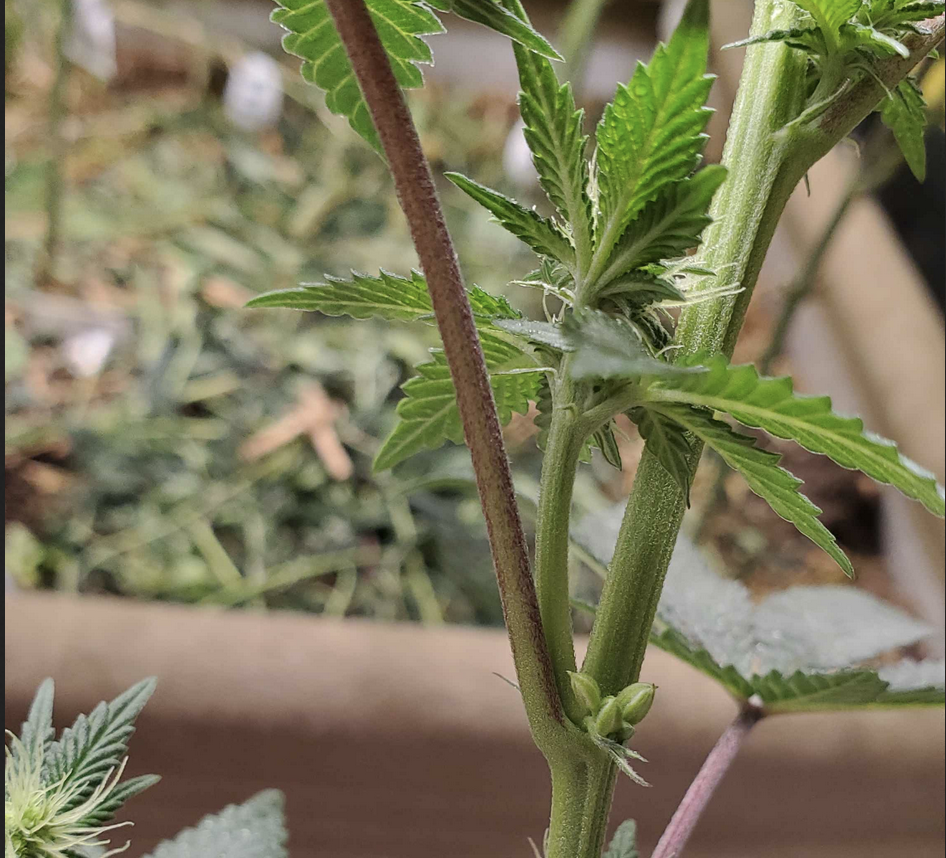
*Watch out for intersex plants at this stage! You should see your flowers beginning to develop, but if you see “pollen sacs” or “nanners” as pictured here, your flower is at risk of going to seed. Your best option would be to terminate the intersex plant. Double check your tent is light tight, and that it’s not getting too hot inside.
*Want to boost your yield? Add fertilizers that won’t harm your soil. Visit www.rootedleaf.com grab a starter pack and use code GROWCAST for 20% off at checkout. You can use their light feed chart in the bottom of your Earthbox up until week 8 of flower.
*Odor Control- your plants are going to start to stink. Make sure you attach your carbon filter to your exhaust fan to control odor at this stage!
Flowering Week 3 and 4: This stage is when the buds will be “setting” into flowers. The stretch will stop, and the flowers will begin to “set” and then increase in size.
*Plant Support- By the end of week 4, you may need to support your plants as they pack on bud weight. Insert bamboo stakes into your soil, and use twisty ties to gently secure each branch to a stake. This will help the plant hold itself up as big buds develop.
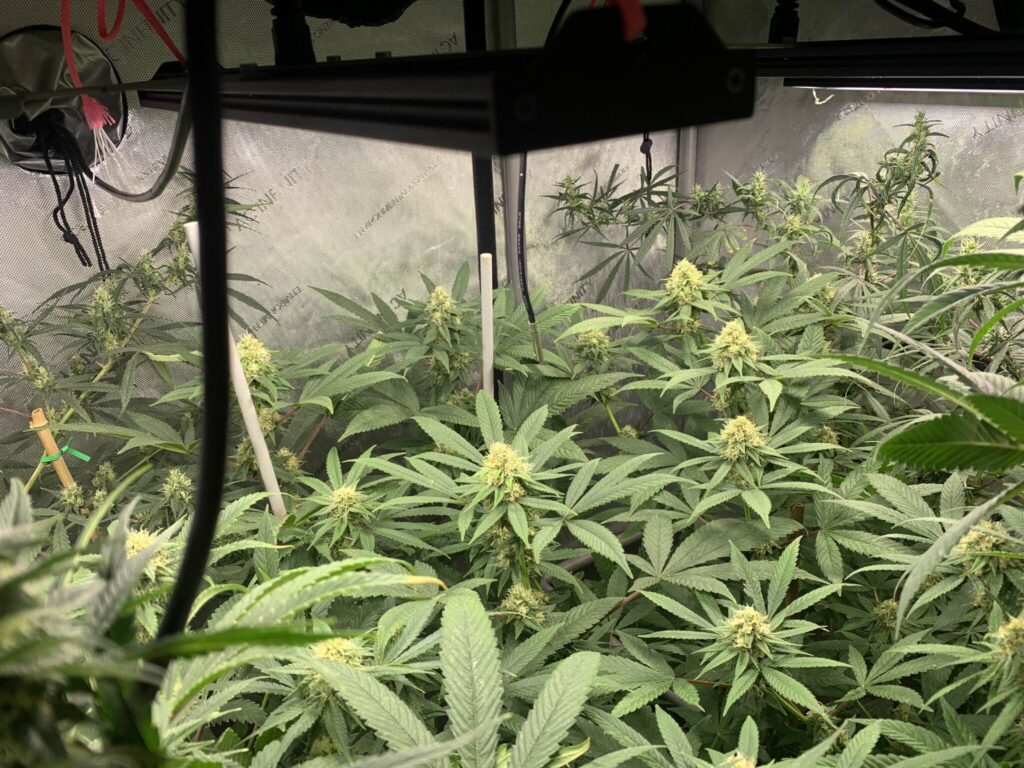
You may also need to remove more fan leaves throughout the weeks, if they begin crowding or laying on top of each other.
Flowering Week 5, 6, and 7: These weeks are when bulking generally takes place. Now the flowers are packing on mass, and getting bigger and bigger every day. The buds should be developing trichomes or “frost” at this point. Make sure the branches are being held up and supported well.

Flowering Week 8 and 9: For many strains, weeks 8-9 when the plant is ripening. The bulking largely stops, the plant may express colors like reds, pinks, purples, reds and yellows as it nears the end of its life. Make sure you stop using any nutrients in your water during this stage to let the plant finish its life cycle naturally.
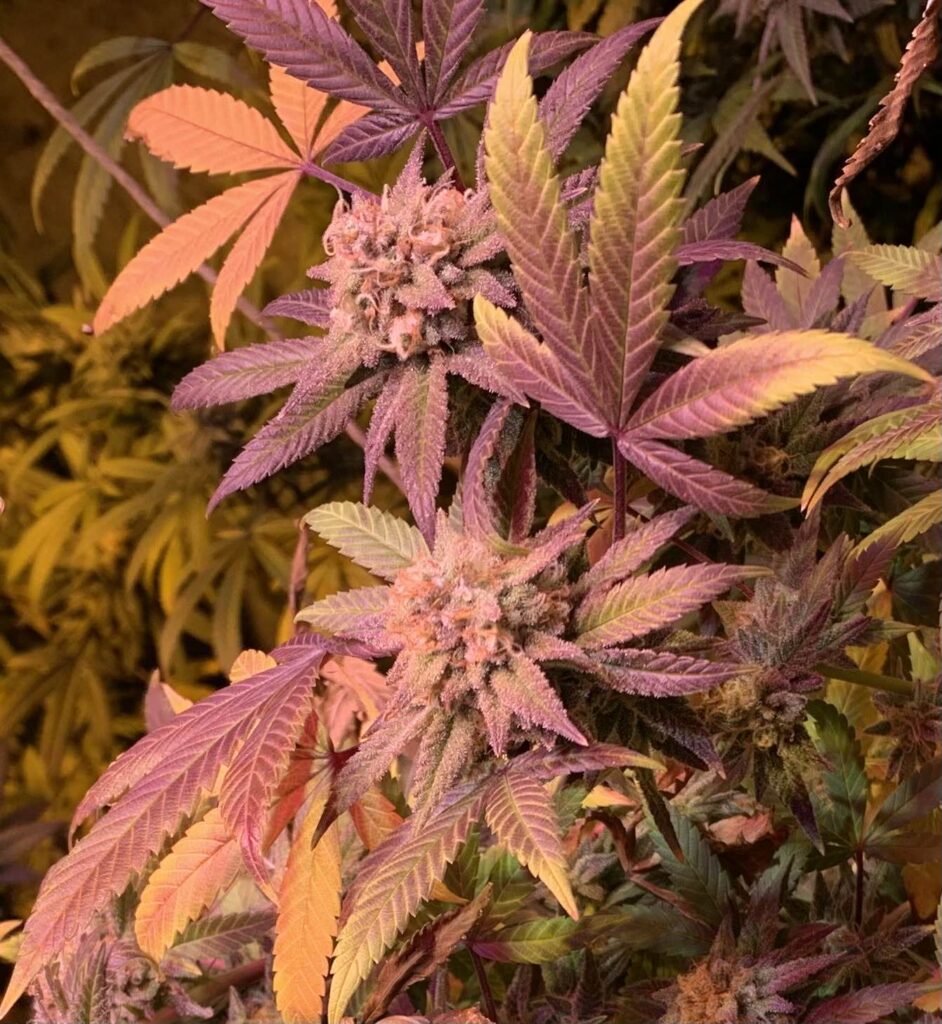
Right around 9 weeks after flip day, you should be ready (or very close) to harvest! It’s also a good idea to let your planter dry out completely right before chopping your plants for harvest.
Congratulations, you’ve made it through your first grow and you’re well on your way to having a massive surplus of the best flower you’ve ever consumed. Enjoy the feeling of a job well done!
But the game isn’t over yet! The harvest and drying phase are critical for a quality crop, so let’s get to it.
————
Harvest, Dry & Cure
Determining When to Harvest: There are many factors to look at when determining if a plant is ready to harvest. With most strains, the buds will have stopped adding mass. The once white hairs should almost all be turned to a dark color, and the buds have a finished, dense feel when gently squeezed.
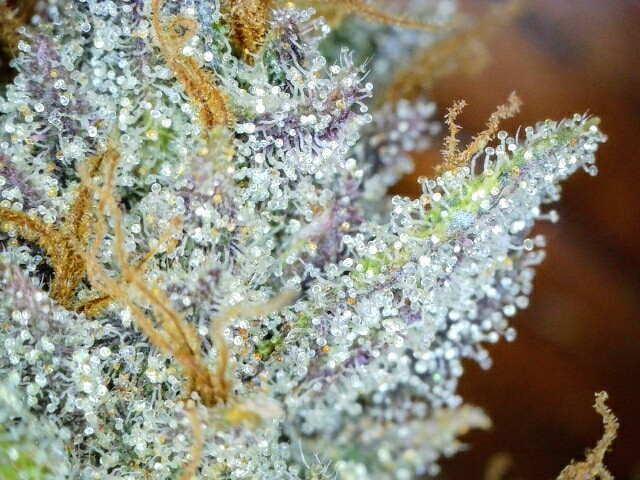
You can also use a cheap handheld microscope to look at the trichomes or “crystals” on the bud. If the trichomes appear mostly clear, you probably need to wait longer. If you see the trichome’s heads appear milky and amber (or other dark colors like purple and red), then you know you’re in the harvest window.
How to Harvest Your Crop:
-Prepare a well ventilated, totally dark, cool space to dry your flower. You can use the same tent you grew in, with the lights off and the fans running. Odor control is also crucial at this stage.
-Remove all the big protruding fan leaves from your plant before anything else so it’s just stalks and buds (leaving the frosty smaller leaves on).
-Using a lopper, clip off your bud branches in 1 to 2 foot sections to hang dry.
-Hang the bud branches upside down, from a wire line, clothes hangers, or twist tie lines. Space them out on the lines so they’re not touching one another
-If you don’t want to dry on lines, you can use an herb drying basket and lay the buds flat. Make sure to turn them over daily during the drying process.
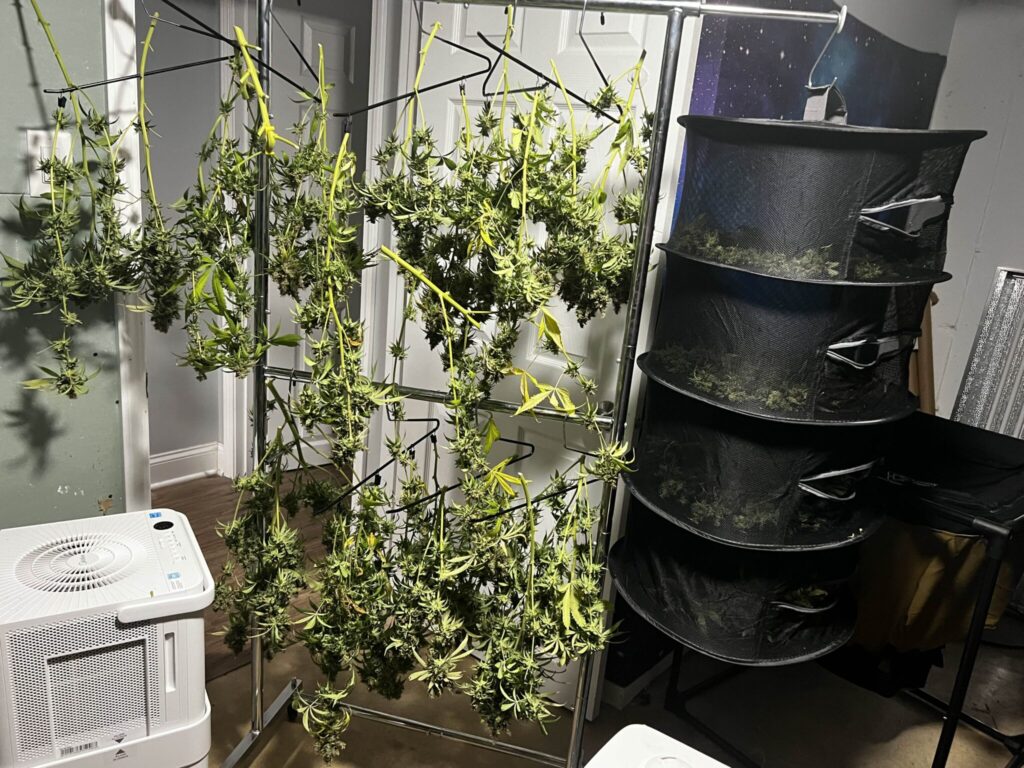
-Use your oscillating tent fan or a different fan to gently blow air across the buds as they dry.
-Dial in your environment using AC and humidification if you need to. Cool temps, like 65-69 degrees Fahrenheit are great, and a nice middling humidity like 55rh is perfect. Don’t let your tent get hot (above 72), too dry (below 40rh) or too wet (above 60rh) if possible.
Patiently let your plants hang dry until they are dry enough to snap when bent. This process can take anywhere from 7-21 plus days depending on the environment, so make sure to be patient! You can take off small buds to smoke-test at this stage as well.
*Note: Don’t bag up your buds too soon! Make sure you are patient and let them dry fully.
Once your buds are dry enough that they smoke like regular flower in a bowl, your dry stage is complete! Trim the smaller leaves of your buds using trimming scissors and prepare to bag or jar them.
We recommend moving them into Grove Bags for storage and cure, opening them up a few times a week to air out.
As the buds age and cure you’ll notice changes in flavor and aroma, as well as experience.
Enjoy your new home grown medicine, it’s going to be the best you’ve ever had. Share it with loved ones, family, and other patients- and take pride in the fact you can create the greatest quality plant medicine right at home- without relying on anyone else!
Happy harvesting to you!
As part of our mission of Overgrow, we ask that you share this guide with anyone who is passionate about the cannabis plant! With your help, we can overgrow the world.
JOIN THE GREATEST COMMUNITY IN CANNABIS

